Home Assistant on a Pi4
I noticed that the Pi3 that had been hosting our Home Assistant setup along with a minimal set of addons was really struggling which came apparent with things not being as stable as they should and often requiring reboots.
Migrating to a Pi4 based setup seemed an obvious choice giving the price point, performance, and power consumption. I oped for the 8GB model as it would provide enough memory for additional addons that I found to self-host.
Requirements
- Raspberry PI4
- micro SDCard (For upgrading the bootloader)
- SSD
- SATA to USB adaptor
Getting the PI ready
You will need to upgrade the Pi bootloader in most cases to enable USB boot. I used the How to Boot Raspberry Pi 4 From a USB SSD or Flash Drive from Tom’s Hardware to get this going.
Installing Home Assistant
Download the latest compatible Home Assistant operating system for your device, in my case I chose the 64-bit version to leverage the full 8gb of RAM.
Connect the SSD to the SATA to USB adaptor and connect this to your PC.
Use a tool such as balena etcher to flash the image to the SSD.
Once flashed, disconnect and connect this to the Pi, ensuring that the SDCard is removed.
Power on the PI and wait for it to boot.
Once booted it should be accessible from the network through https://homeassistant.local:8123.
After Home Assistant has been installed you will be greeted by a screen prompting you to setup.
If you are coming from an existing install you will be able to provide the snapshot downloaded in an earlier step. Finally now wait for the device to reload your existing configuration. This can take a while to do, for me I noticed it took around 20 minutes to restore the device to it’s previous state.
After thoughts
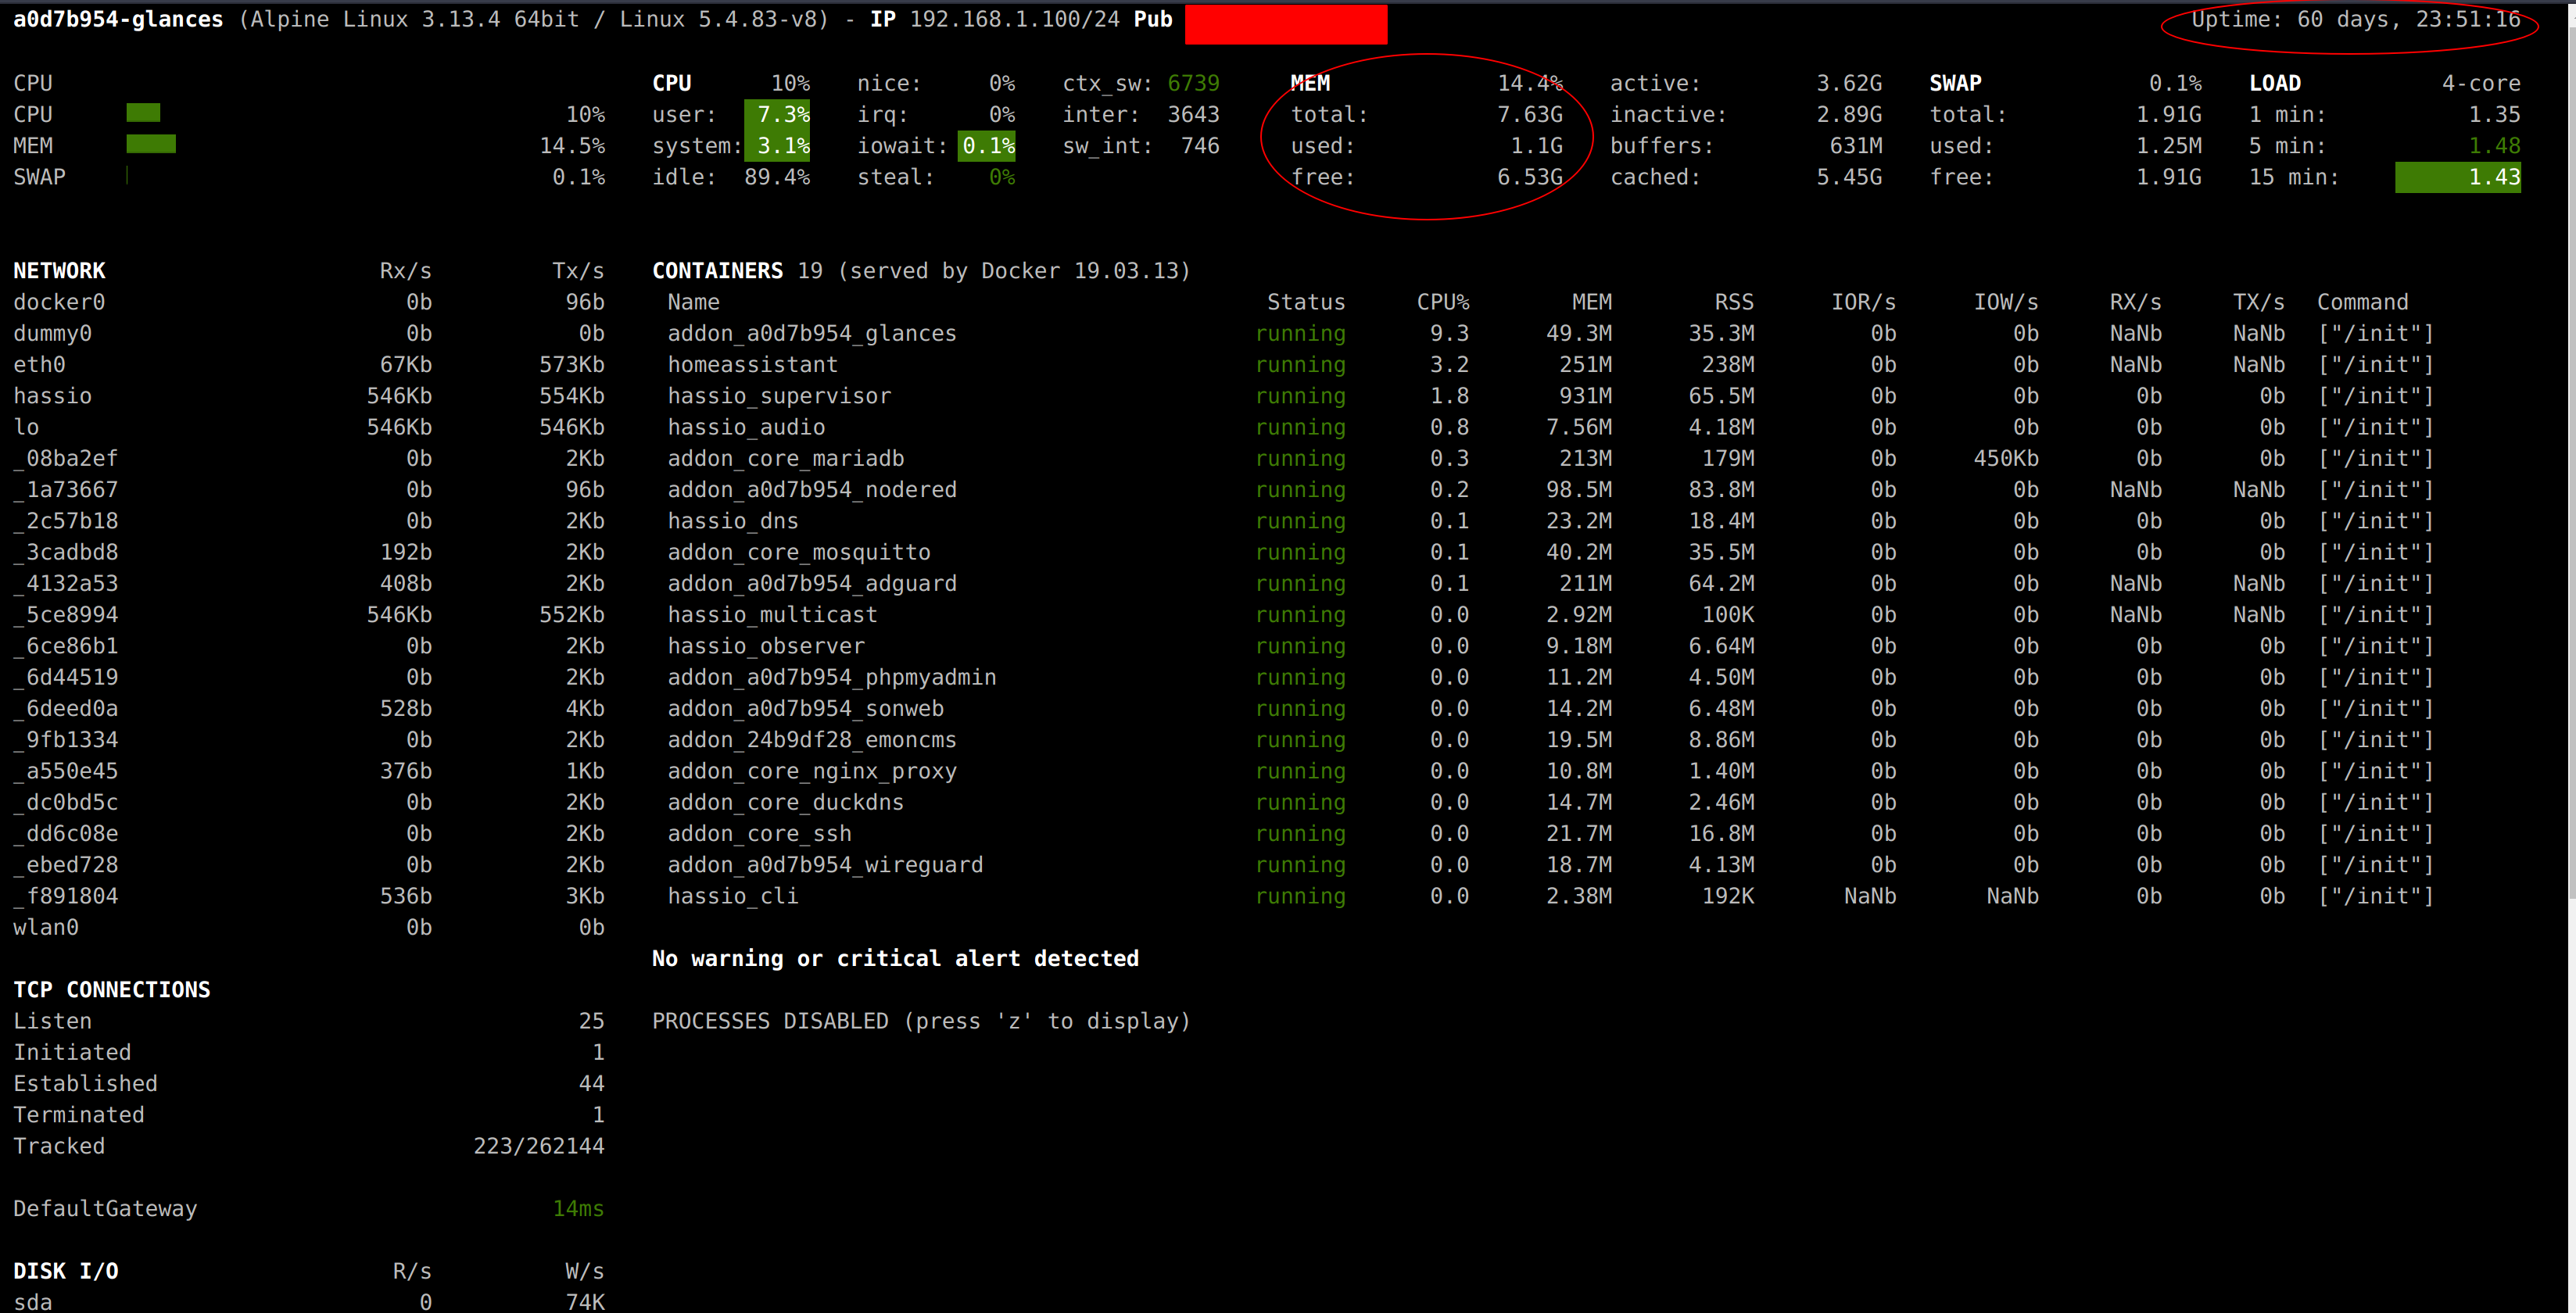
I installed the glances addon to get an easier overview of resource utilisation. As you can see it’s got lots of free memory for future expansion and has been running stable for the past few months.