Connecting Tasmota to Home Assistant
Leading on from a previous post regarding Flashing custom firmware on Gosund SP111 devices.
This post explains how to connect devices running Tasmota to Home Assistant, allowing both control and integrating sensors if your device has power sensing capabilities such as the Gosund SP111.
This post assumes that you have a working Home Assistant setup already configured with MQTT without discovery enabled. If you haven’t already got this setup please follow their official documentation.
Setting up the device
To start with ensure that you have configured MQTT on the device. To enable MQTT you must first go Configuration -> Configure Other -> Check MQTT Enable
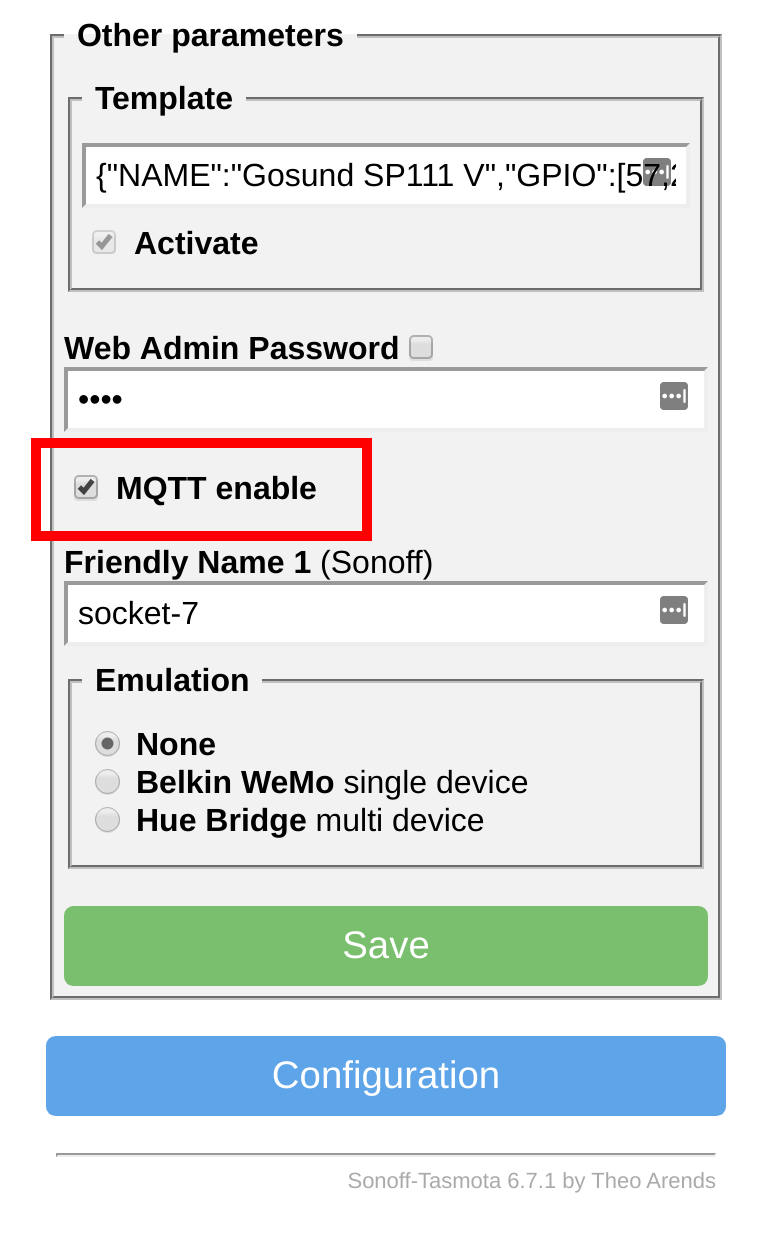
Once enabled you can configure the device to connect to the MQTT broker that you have setup to be used by Home Assistant.
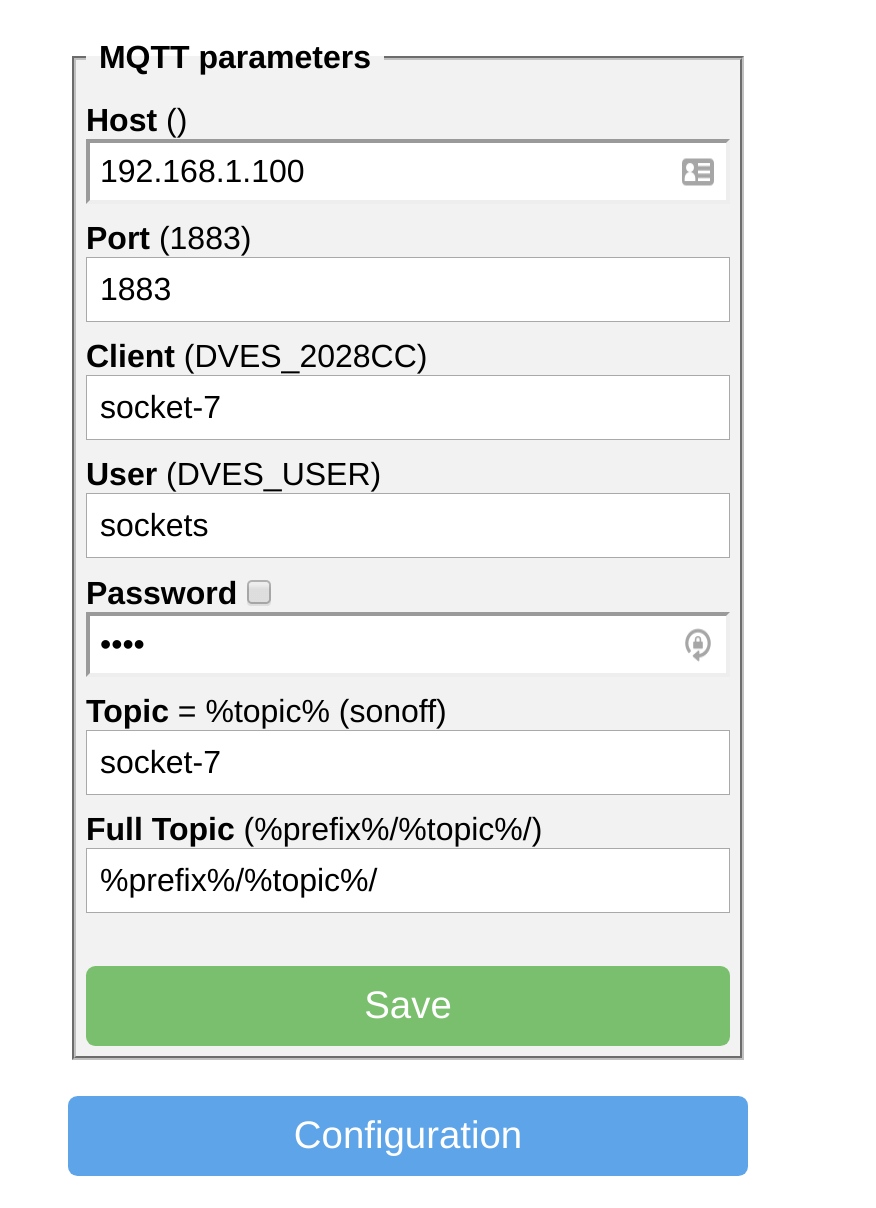
Your device should reboot after saving, and from the console view you should be able to clearly see if there is an authentication or configuration issue.
Configuring home assistant
Setting up switches
In your home-assistant configuration under switch: you can now configure your MQTT based device.
- name: socket_7
  platform: mqtt
  state_topic: stat/socket-7/POWER
  command_topic: cmnd/socket-7/POWER
  availability_topic: tele/socket-7/LWT
  qos: 1
  payload_on: 'ON'
  payload_off: 'OFF'
  payload_available: Online
  payload_not_available: Offline
  retain: false
Replacing socket_7 with the name of your device, and socket-7 with the topic you configured earlier.
You can retrieve this information on the information page on Tasmota.
Setting up sensors
If your Tasmota enabled device exposes some sensors like power reading. You will also be able to extract this out and expose this to Home Assistant.
Place the following under sensor: within your Home Assistant configuration.
- name: socket_7_energy
platform: mqtt
state_topic: "tele/socket-7/SENSOR"
value_template: '{{ value_json["ENERGY"]["Total"] }}'
unit_of_measurement: kWh

- name: socket_7_power
platform: mqtt
state_topic: "tele/socket-7/SENSOR"
value_template: '{{ value_json["ENERGY"]["Power"] }}'
unit_of_measurement: W
Replacing the name values with something meaningful to you, and socket-7 with the topic you configured earlier.
To understand what kind of information is being published you can view the raw messages from the console view of the Tasmota UI. Or leverage another tool to help you explorer your topics including:
Displaying sensor stats
If you’re using Lovelace as a frontend for your setup I can recommend the Mini Graph Card extension by @kalkih. It provides various minimalistic and customisable cards that can be useful for displaying metrics and sensor statistics.
For example you can plot your kWh metics as configured above.
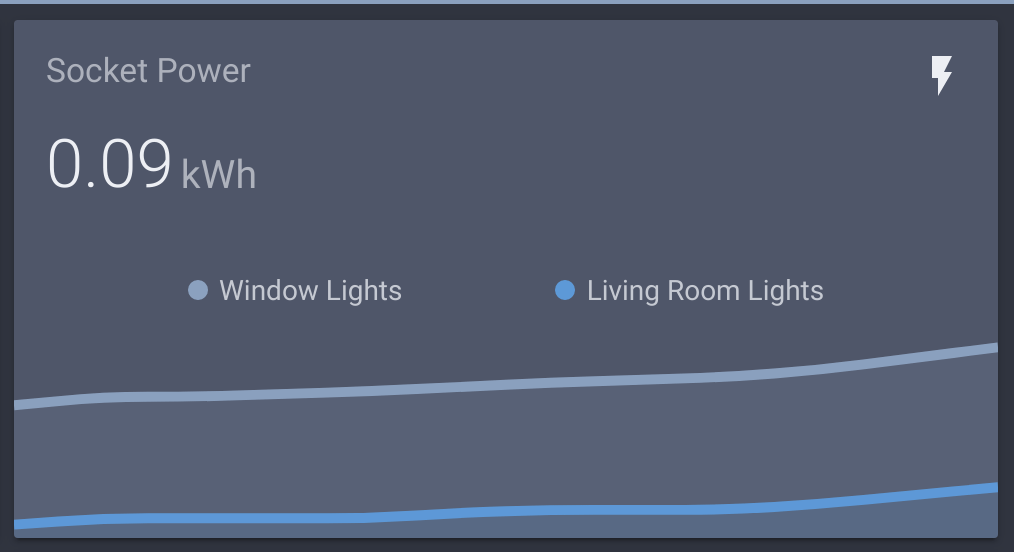
Follow the installation instructions and then configure your view with a card like below.
  - type: custom:mini-graph-card
    name: Socket Power
    icon: mdi:flash
    entities:
      - entity: sensor.socket_7_energy
        name:  Window Lights
      - entity: sensor.socket_8_energy
        name: Living Room Lights